Two-headed Aevis
"Given its powers of flight, this gargantuan serpent may seem a close relative of winged scalekin like the sanuwa. That its two heads have separate elemental affinities, however, would suggest it is in fact an arcane fusion of different creatures. One need not look so far as the ancient Allagans, known creators of chimeras like the minotaur, to find those with the ambition to produce ever more powerful life-forms. Thus it stands that the two-headed aevis was likely wrought by mages of the Fifth Astral Era in their quest for weapons of war."
Overview
At the start, Buffet tethers every player to one boss head (Blue Head or Green Head). Each player can only deal damage to their assigned head for the remainder of the encounter.
Instead of dividing the parties per head, everyone will go to the side of the Blue Head, while a designated tank takes the Green Head solo.
Fight Timeline
Buffet
Both heads tether to all players on their respective half of the arena, inflicting a debuff that restricts players to only attacking their tethered head.
Preposition prior to the pull as follows:
- Everyone (all parties except the solo tank): Go to the left side of the arena to tether to and attack the Blue Head.
- Designated Tank: Goes to the right side of the arena to tether to and take the Green Head solo.
Breath and Fugue
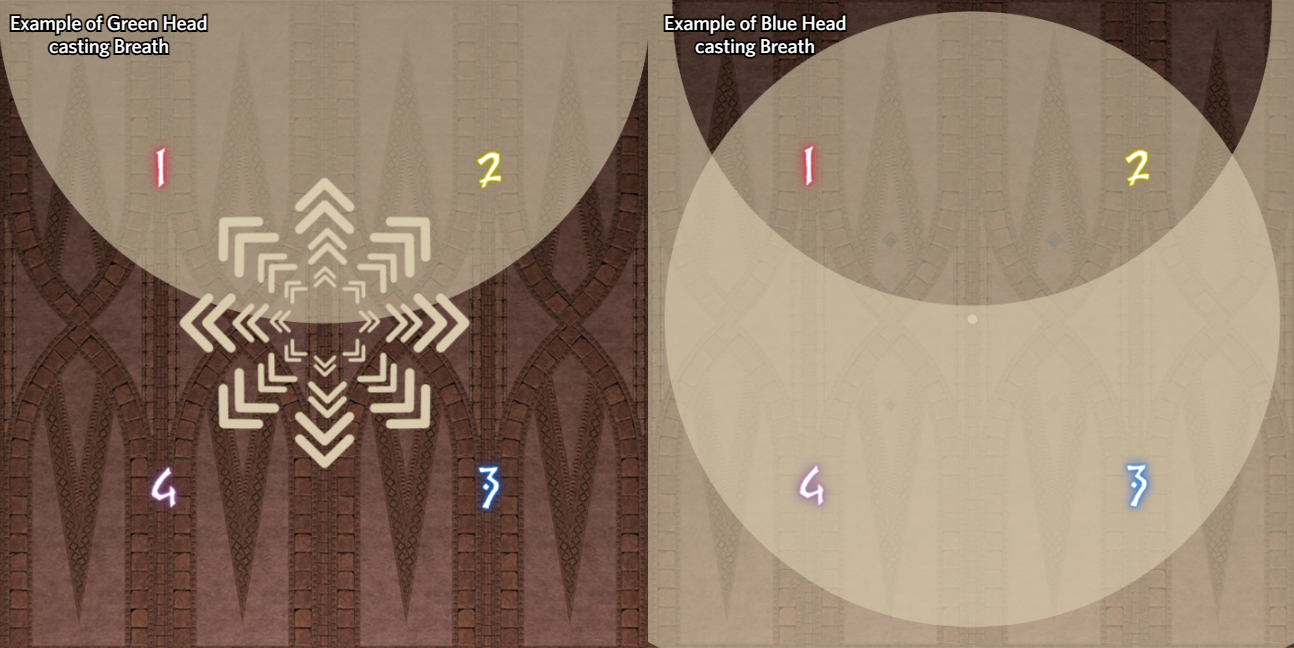
Both heads will start casting at the same time: one head casts Breath while the other casts Fugue. Whichever head is casting Breath will tether to the center of the arena, indicating which variation is happening.
- Blue Head casting Breath:
- Move close to the front corners of the arena.
- Avoid the large circle AoE in the center and the giant donut AoE surrounding the boss.
- Green Head casting Breath:
- Preposition near the center of the arena.
- Ride the knockback to the back of the arena to avoid the large circle AoE centered on the boss.
Blazeloop and Crossblaze
One of the heads will tether to the ground and begin casting one of two patterns. Either head can start the pattern, and the other head will always cast the inverse follow-up:
- Same mechanic cast twice (Repeat): If the first head casts Blazeloop & Repeat, the follow-up will be Crossblaze & Repeat (or vice versa if starting with Crossblaze).
- Alternating mechanics: If the first head casts Blazeloop & Crossblaze, the follow-up will be Crossblaze & Blazeloop (or vice versa if starting with Crossblaze).
Before each cast resolves, a small circular bait AoE will appear on the ground first. Do not get baited into premature dodges by this initial circle.
- Blazeloop: Becomes a donut AoE immediately after the small circle resolves. Step inside the donut area once the initial circle vanishes.
- Crossblaze: Becomes a large cross AoE immediately after the small circle resolves. Ensure you are standing off-cardinal (out of line with the cross arms).
Arcane Revelation 1
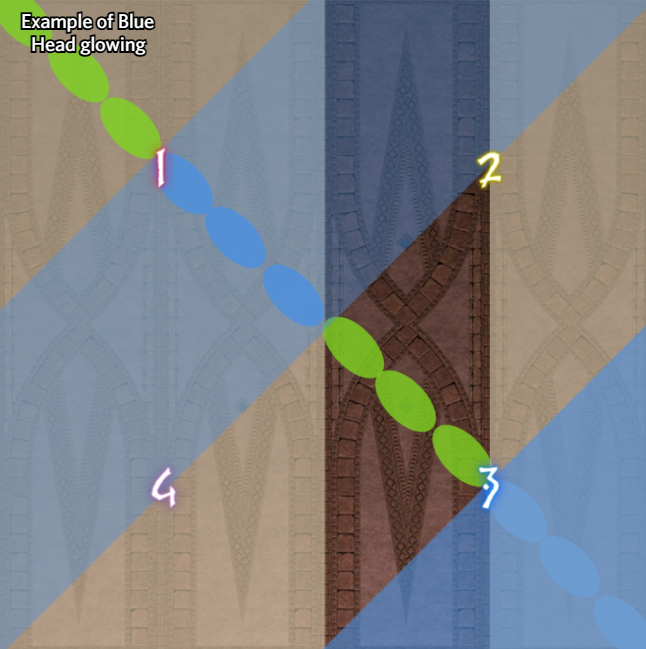
A set of portals will spawn diagonally across the arena. When triggered, portals fire line AoEs both forward and backward. Each head lines up with the lanes on its respective half of the arena.
One of the two heads will display a glowing ring around it. This indicates that this head will cleave both of its lanes, and all portals matching its color will activate.
- How to resolve:
- Move over to the side of the non-glowing head.
- Stand in the lane that the non-glowing head is not directly lined up with.
- Line yourself up with the colored portals that are not activated.
Summon & Breathy Duet
The boss will first cast Summon, spawning a set of four ice cones and four lightning cones around the arena. When triggered, each cone fires a large conal AoE.
The heads will then cast Breathy Duet and tether to various locations across the arena. The sequence resolves as follows:
- Telegraph Phase: The heads telegraph all tether locations in order. Use this time to identify your initial safe spot and start prepositioning there.
- Resolution Phase: Large circle AoEs explode at each telegraphed tether location in order, which also triggers their matching element cones to fire.
Arcane Revelation 2
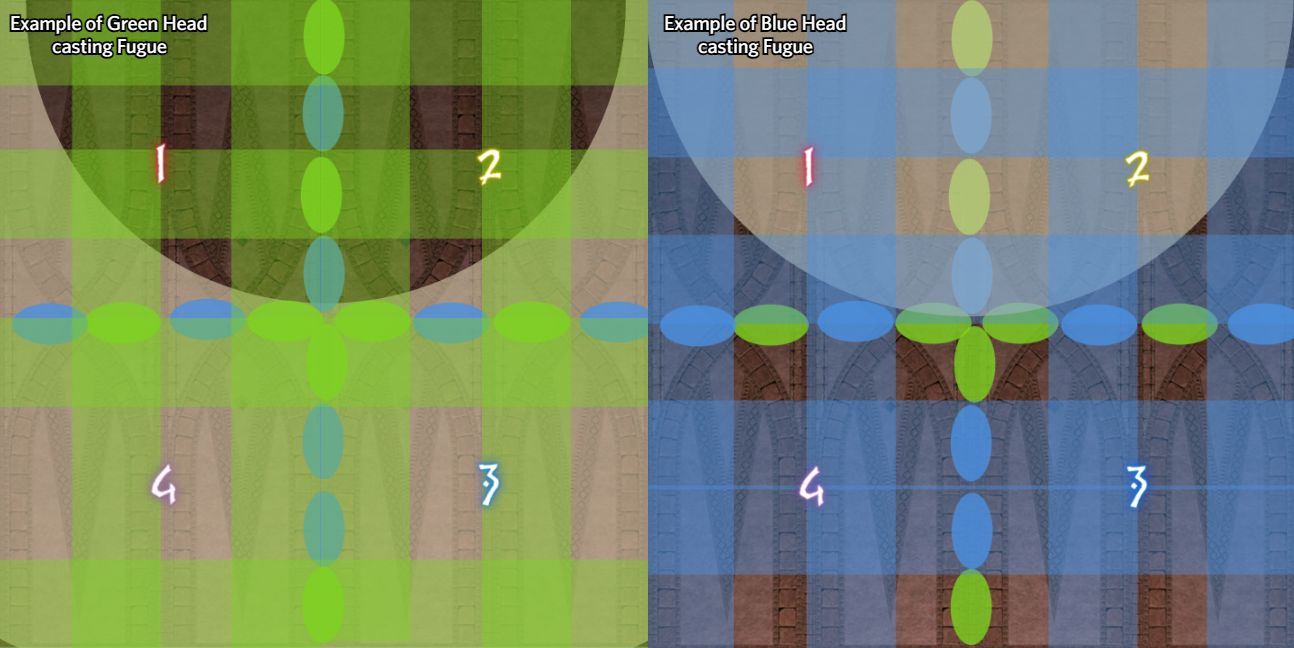
Similar to the first Arcane Revelation, but with two lines of portals in a cross formation, combined with a Fugue attack from one of the heads.
- Green Head casting Fulgurous Fugue:
- Line up with the Blue Portals.
- Stay close to avoid the donut AoE.
- Blue Head casting Freezing Fugue:
- Line up with the Green Portals.
- Stay far away to avoid the circle AoE.
Hissing Resonance
The boss assigns personal debuffs to all players: Blue Noise or Green Noise, with a directional arrow of Westerly or Easterly. This mechanic is paired with another set of Blazeloop and Crossblaze.
- Knockback Resolution:
- When the head matching your debuff color resolves its Blazeloop or Crossblaze, you will be knocked back in the direction of your debuff arrow.
- The knockback distance is roughly equal to the width of one lane.
- This knockback happens twice in total, once for each mechanic cast by your matched head.
Waymarks
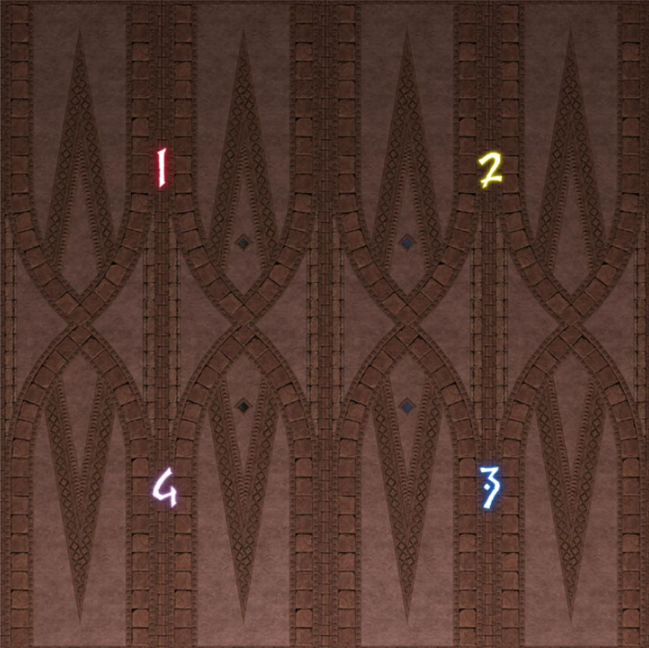
Below is the waymark setup used for this encounter, primarily to assist with callouts during Breathy Duet. The order of the waymarks will be called out for the safe route.